
Mr. Mine is a game about mining developed by Playsaurus, known for its addictive blend of idle mining, deep progression, and quirky underground discoveries.
As you advance through the mineshaft, you eventually unlock one of the most complex systems in Mr Mine gameplay: the Nuclear Reactor.
The Reactor becomes your late-game engine for massive energy output, isotope production, and long-term scaling. But to get the most out of it, you need smart, efficient layouts.
Because the grid is limited and each component interacts differently, the way you place pieces dramatically affects performance.
In this guide, you’ll learn how the Reactor works, why Mr Mine Reactor layouts matter, and which builds are best for different goals.
What is the Reactor in Mr. Mine Idle?
The Nuclear Reactor in Mr.Mine is a late-game structure located at 1133-1134km.
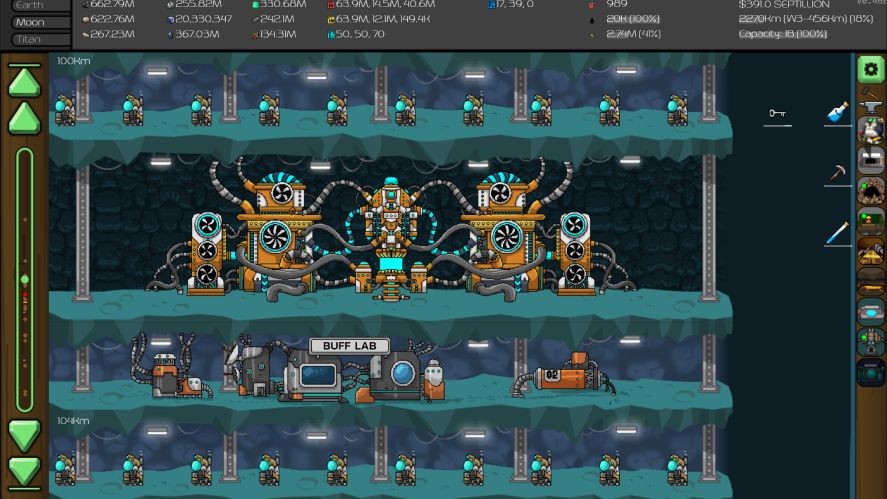
The Reactor revolves around placing components on a grid and balancing heat against output. It acts as a powerful energy and isotope generator.
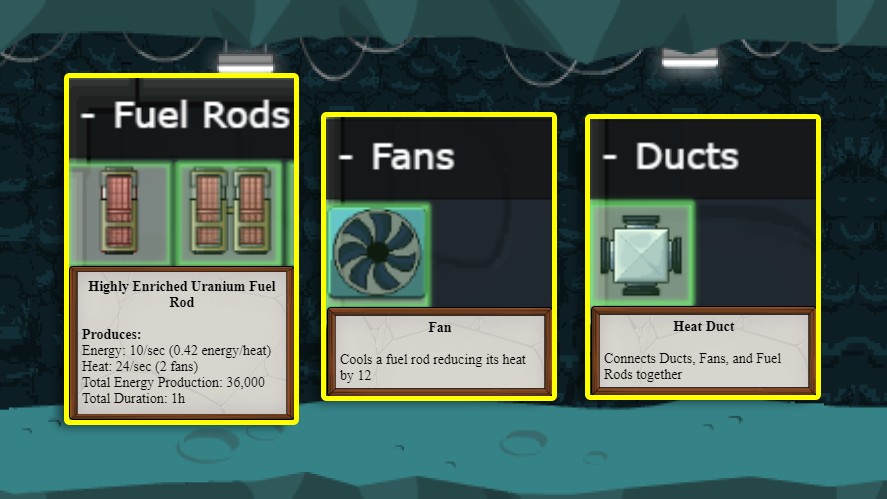
The core parts you’ll work with include:
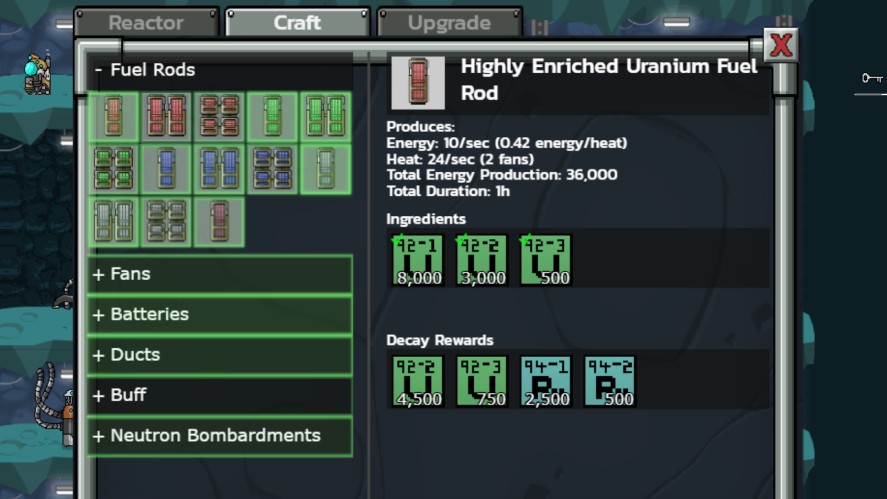
- Fuel Rods: generate energy, heat, and isotopes.
- Fans: reduce heat.
- Batteries: store energy.
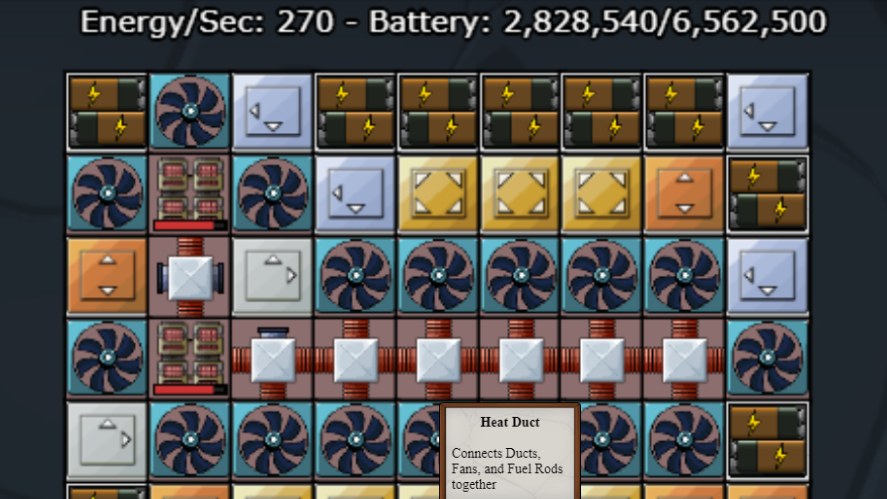
- Heat Ducts: like wire, connect the components together.
- Bombardments: use energy to generate heat and late-game isotopes.
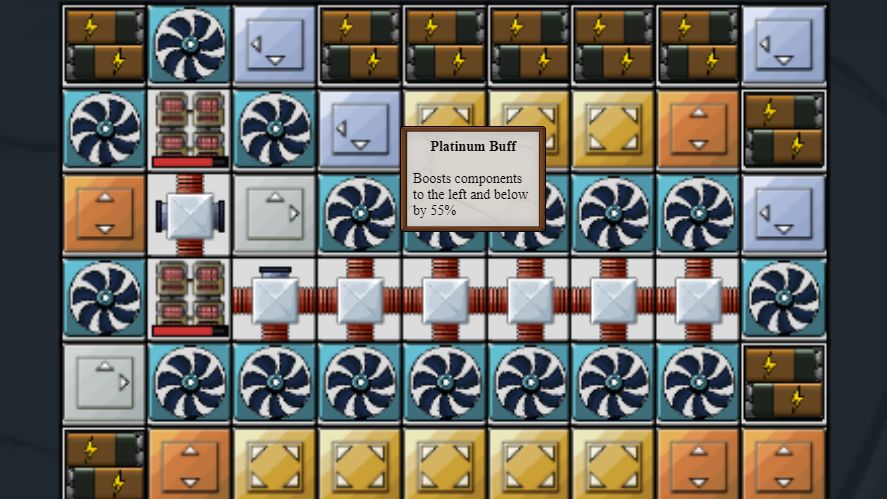
- Buffs: boost the efficiency of other components.
Mr Mine Reactor layouts matter because these components interact dynamically.
Too much heat shuts everything down. Too little energy flow wastes potential. Poor placement can block connections or reduce the effect of buffs.
A well-designed layout keeps heat under control, maximizes energy, and produces more isotopes. It’s essential for pushing further in this idle mining and mine clicker experience.
To learn more about the Reactor components, check out this Mr. Mine Idle: Nuclear Reactor and Buff Lab.
Reactor Progression Levels & Grid Sizes
The Nuclear Reactor grows significantly as you upgrade it, and each level increases the grid size, gives more room for components.
| Reactor Level | Grid Shape | Grid Size | Cost |
|---|---|---|---|
| Level 1 | 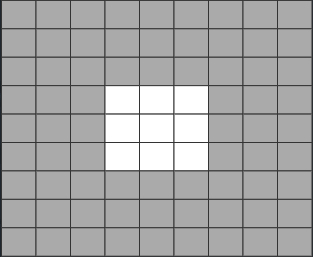 | 9 | Free |
| Level 2 | 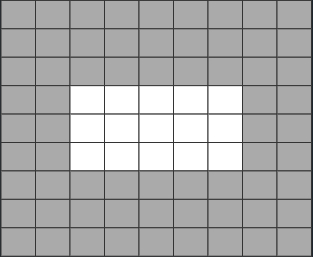 | 15 | 25 Building Materials 20,000 Power 10 Einsteinium 1 |
| Level 3 | 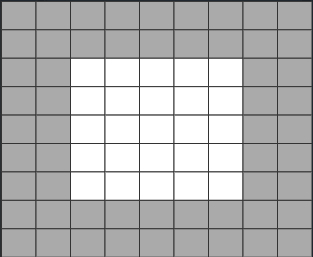 | 25 | 50 Building Materials 200,000 Power 100 Einsteinium 1 |
| Level 4 |  | 45 | 100 Building Materials 750,000 Power 50 Einsteinium 2 |
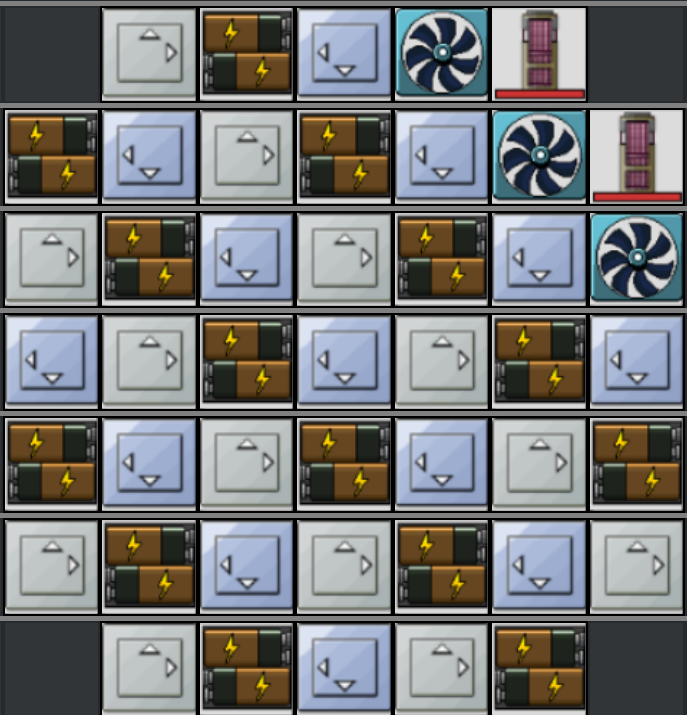
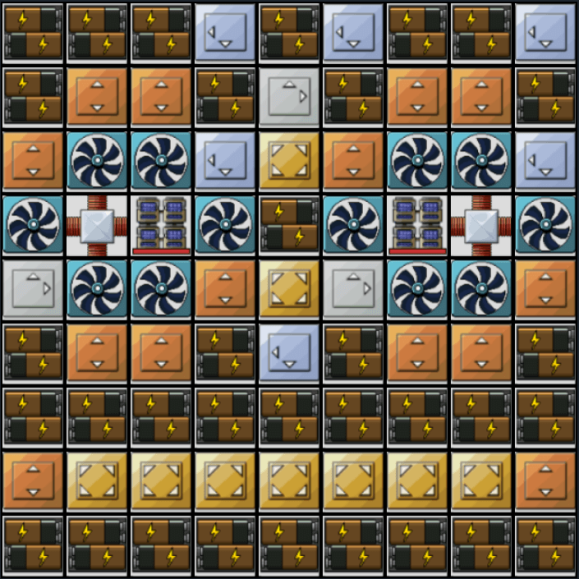
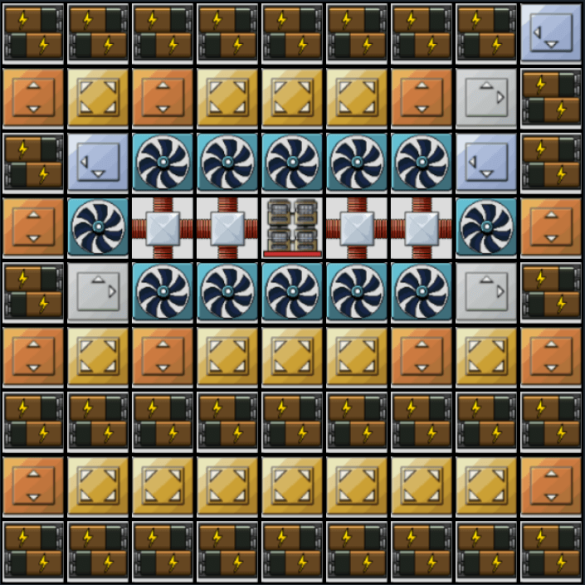
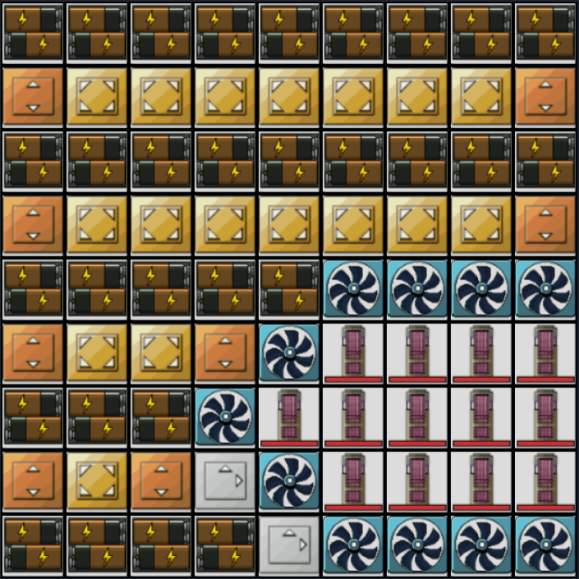
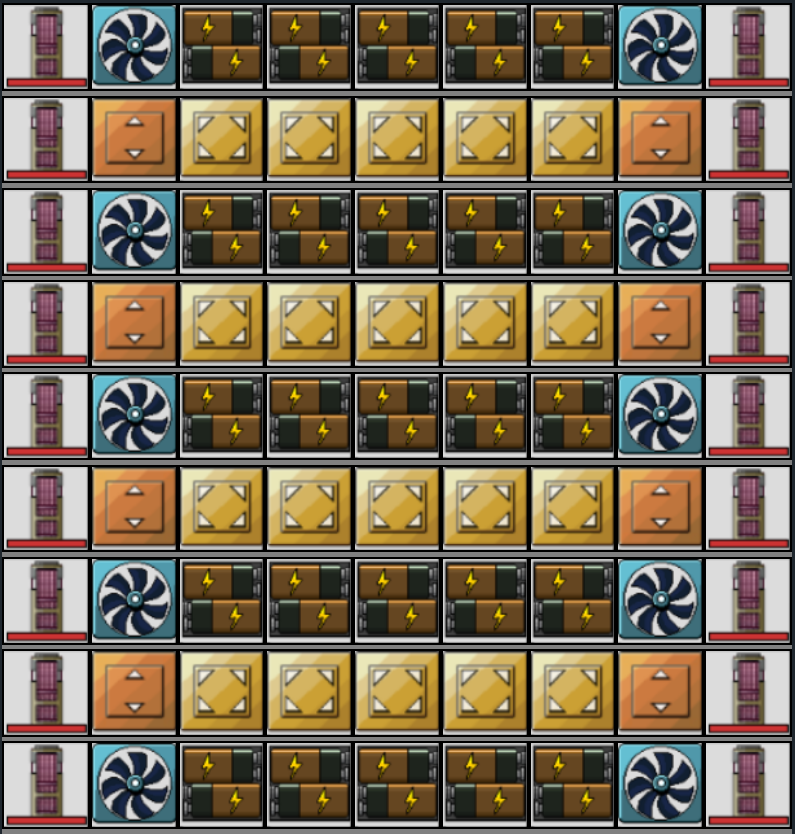
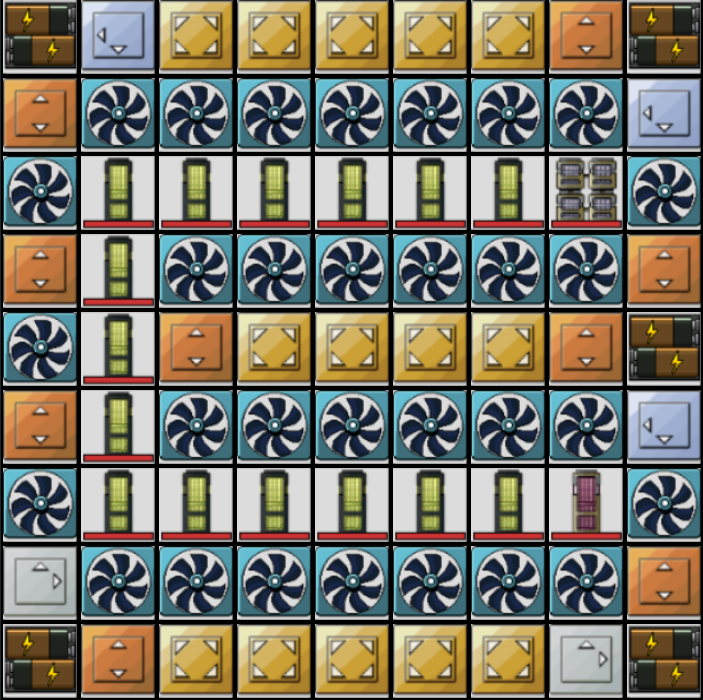
| Level 5 |  | 81 | 500 Building Materials 1,500,000 Power 30 Einsteinium 3 |
Core Principles of Effective Mr Mine Reactor Layouts
Strong Mr Mine Reactor layouts follow a logic: remove heat, then generate energy, then optimize output.
If you design in that order, your Reactor stays stable and scales much farther than if you simply place components at random.
The first rule is heat must be removed, always. Fuel Rods generate a lot of heat, so they need Fans adjacent or connected via Heat Ducts.
Heat Ducts let you route cooling across the grid, preventing meltdown and giving more freedom in Rod placement. Any Fuel Rod without adequate cooling becomes a bottleneck.
Once heat is stable, you can focus on energy generation. That means placing Fuel Rods in efficient formations, supported by Bombardments and Batteries.
Buffs also matter. Using Buff components smartly can multiply your layout’s efficiency, whether you’re pushing for more isotopes or simply maximizing energy per second.
The best workflow is always the same:
- Secure cooling
- Build your Rod structure
- Optimize with Buffs
Speaking of mistakes, some pitfalls appear repeatedly in the community:
- Not placing enough fans
- Clustering rods too tightly without ducts
- Breaking energy connectivity
- Using rod types that generate too much heat for your current setup.
Avoid those, and even a simple layout will outperform a sloppy large one.
Mr Mine Reactor Layouts by Reactor Level
As your Reactor grows through each upgrade tier, the best layout approach evolves too. Below is a practical progression so you always know what to build at your current stage.
Thanks to 8thpurplewizard and .ballman for these layouts.
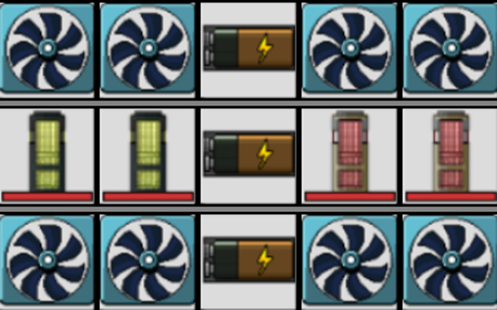
Level 1 Layouts
Level 1 gives you limited grid space, so the goal is to create a stable layout that generates steady early energy.
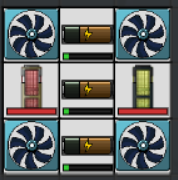
A typical beginner setup places 1–2 basic Fuel Rods in the center with Fans directly adjacent on as many sides as possible.
| Layout | Description | Max Energy | Energy/Sec |
|---|---|---|---|
 | To get Einsteinium for Reactor 2 | 15k | 0 |
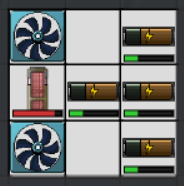 | To get Energy for Reactor 2 | 20k | 10 |
 | Mix of #1 and #2 | 10k | 6 |
 | Upgraded version of #2 | 20k | 16 |
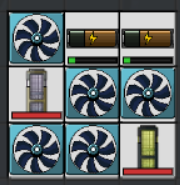
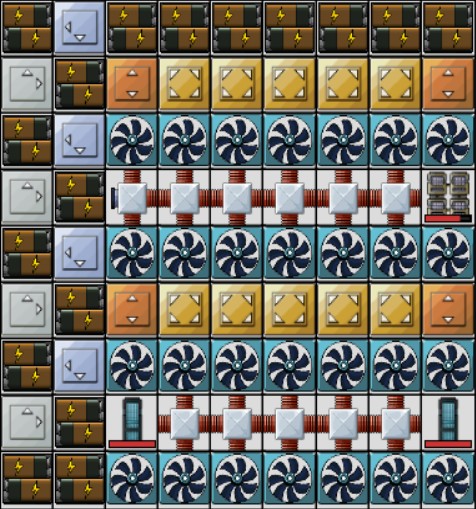
Level 2 Layouts
Level 2 offers noticeably more grid space, allowing you to try 2–3 Rods with proper cooling and your first experiments with Heat Ducts.
You can also begin incorporating a couple of Batteries to store energy.
The objective here is modest complexity: create a small cluster of Rods with Ducts and Fans surrounding them. You don’t need buffs yet.
| Layout | Description | Max Energy | Energy/Sec |
|---|---|---|---|
 | To get Einsteinium and Energy | 100k | 20 |
 | To get Einsteinium | 150k | 0 |
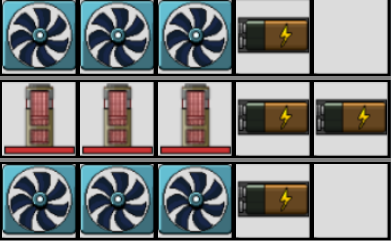 | To get Energy for Reactor 3 | 200k | 30 |
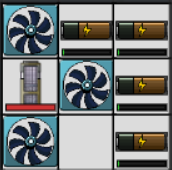
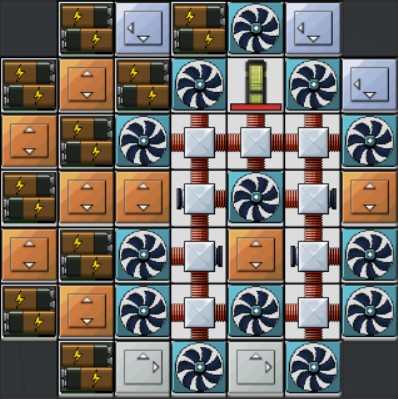
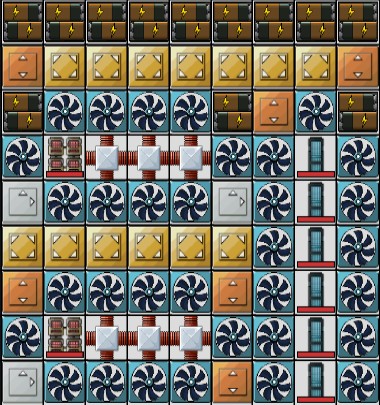
Level 3 Layouts
Once you reach Level 3, the grid opens up enough to build structured layouts.
You can now run multiple Rods, weave Ducts more efficiently, and start using Buffs and Bombardments for the first time.
It’s also the first level where you can realistically target isotope production rather than just power.
| Layout | Description | Max Energy | Energy/Sec |
|---|---|---|---|
 | To get Einsteinium | 1.937,5M | 0 |
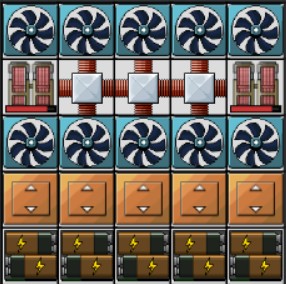 | To get Energy for Reactor 4 | 1.937,5M | 60 |
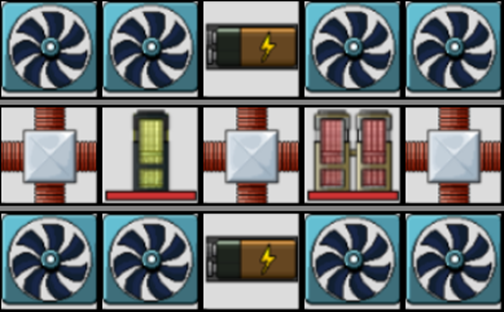
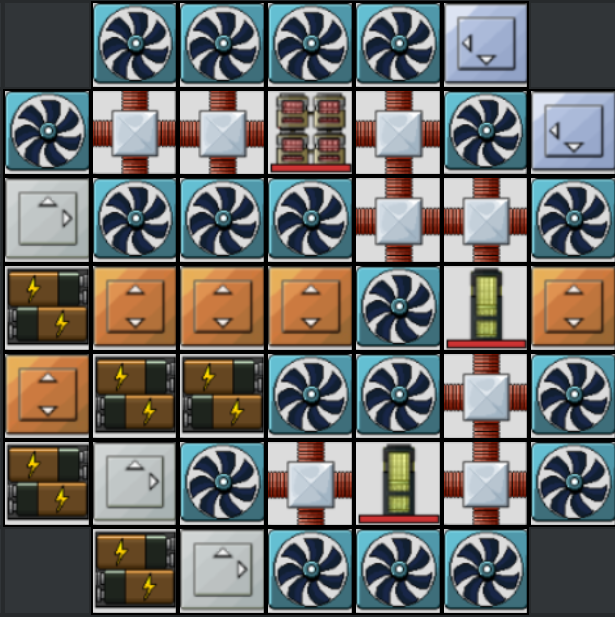
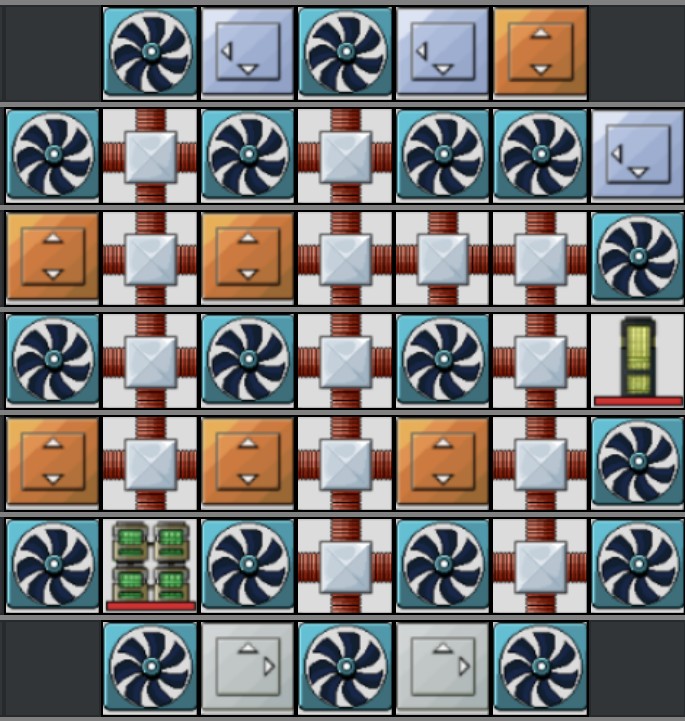
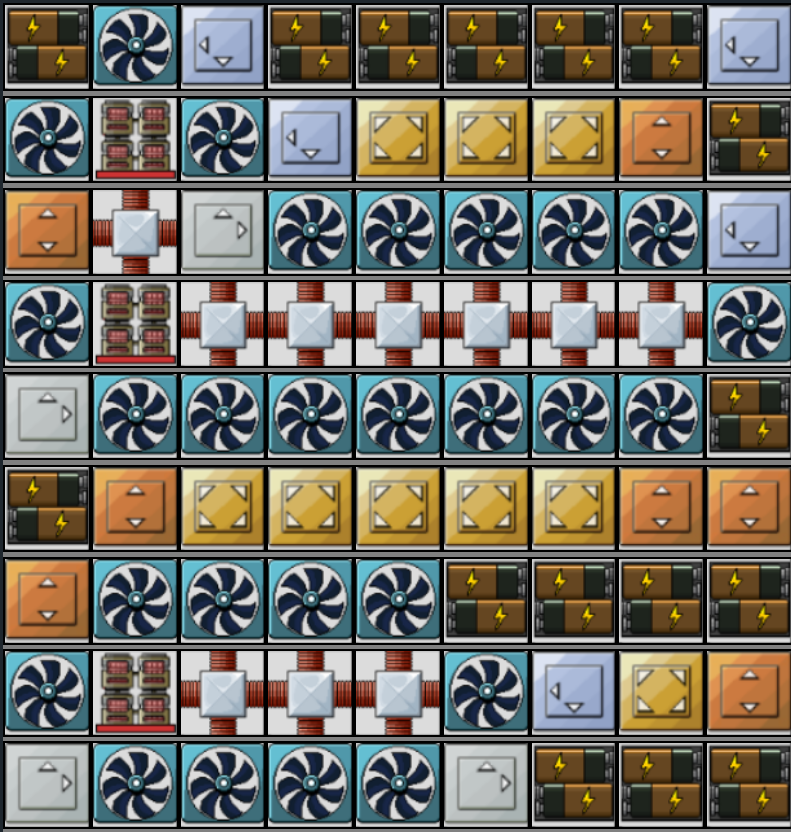
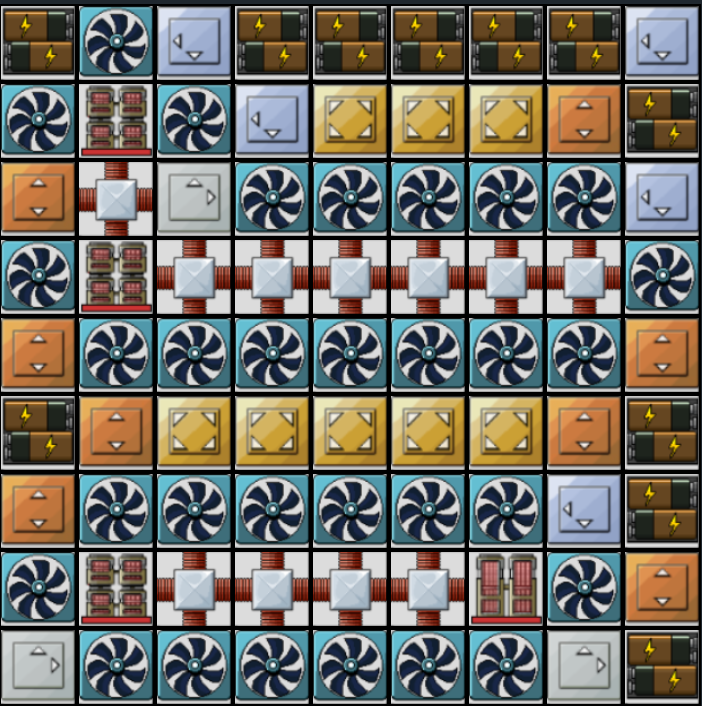
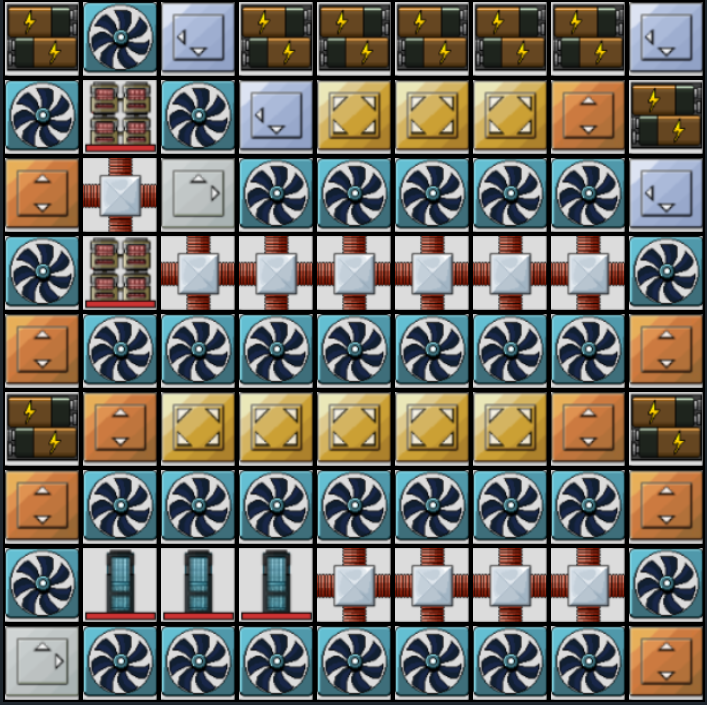
Level 4 Layouts
Level 4 is when the reactor becomes a true puzzle. You gain a large grid and multiple Rod types.
Some players start creating specialized isotope farms by isolating certain Rod types and surrounding them with Buffs.
Heat management becomes a delicate dance: bigger rods produce more energy (or isotopes) but can cook your entire grid if Fans and Ducts aren’t placed precisely.
| Layout | Description | Max Energy | Energy/Sec |
|---|---|---|---|
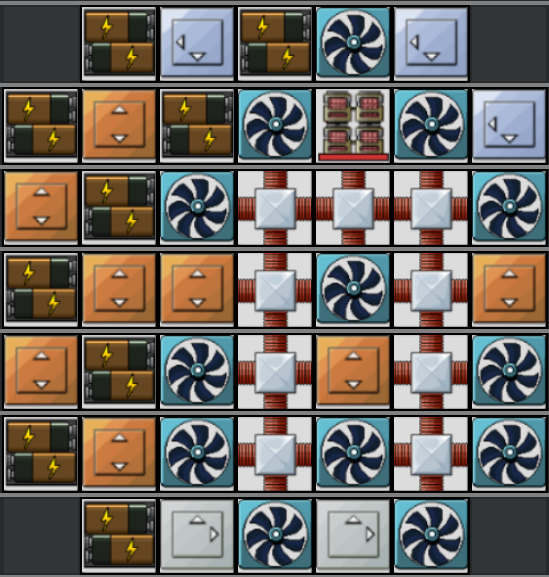 | Use red rods to get Energy | 3.9M | 90 |
 | Use red rods to get Energy | 1.55M | 180 |
 | Use blue rods to get Energy | 4.15M | 144 |
 | Use gray rods to get Energy | 4.512M | 144 |
 | Use gray rods to get Energy | 2.825M | 144 |
 | To get 10M quest | 10.1M | 12 |
 | To get Einsteinium and Energy | 2.462,5M | 30 |
 | To get Einsteinium and Energy | 1.937,5M | 30 |
 | To get Einsteinium | 0 | 0 |
 | To get Einsteinium | 662.5k | 0 |
 | To get Einsteinium | 3.9M | -90 |
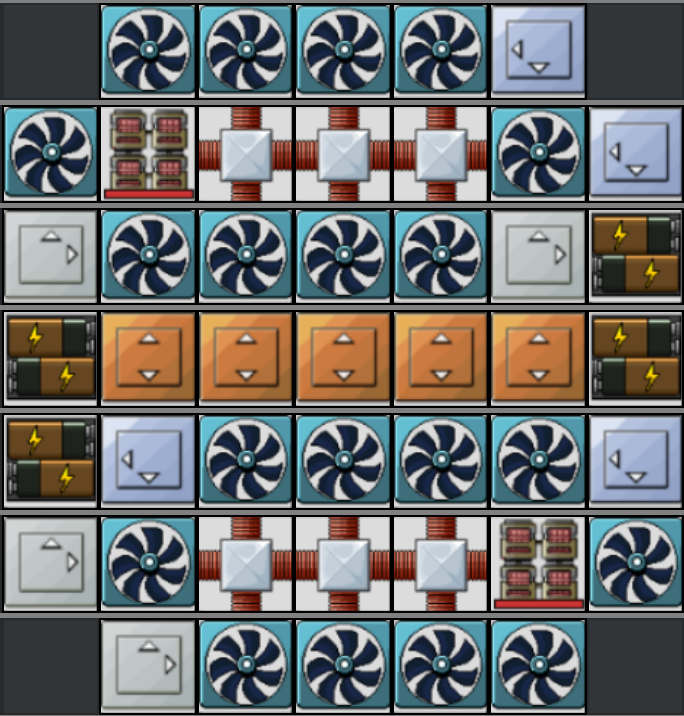
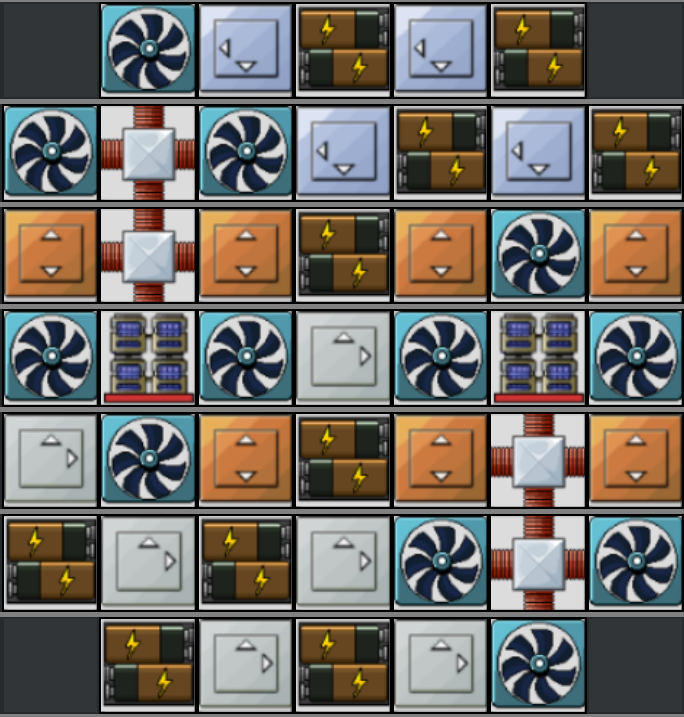
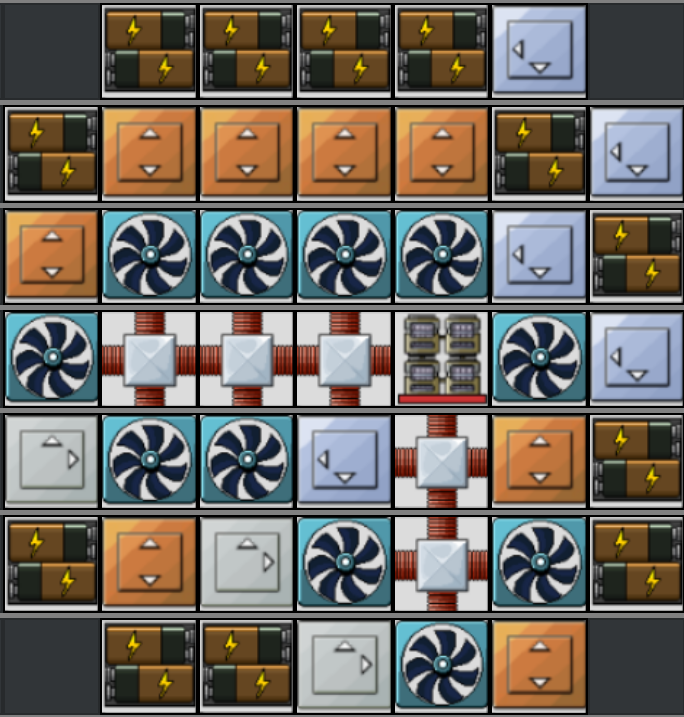
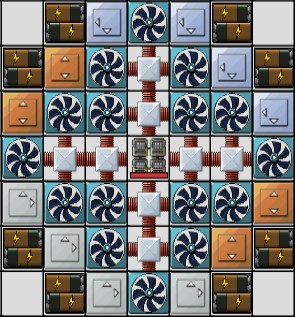
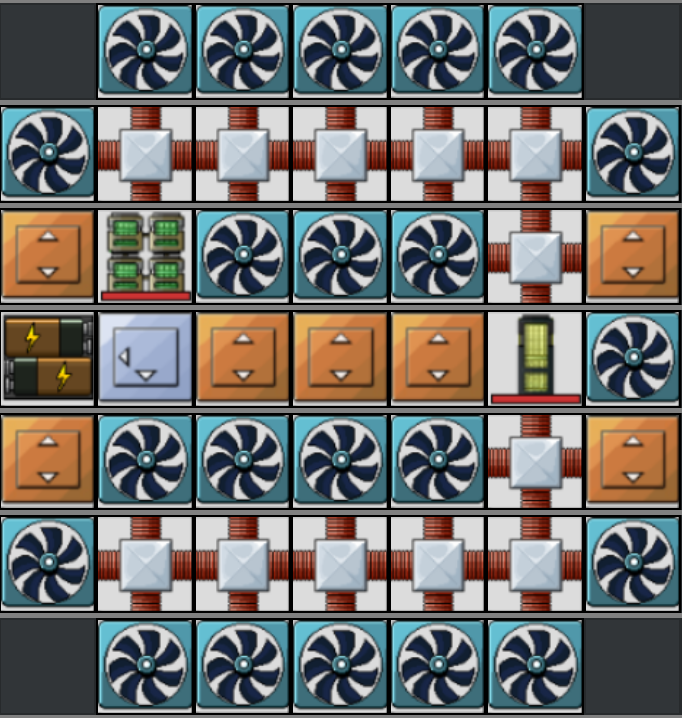
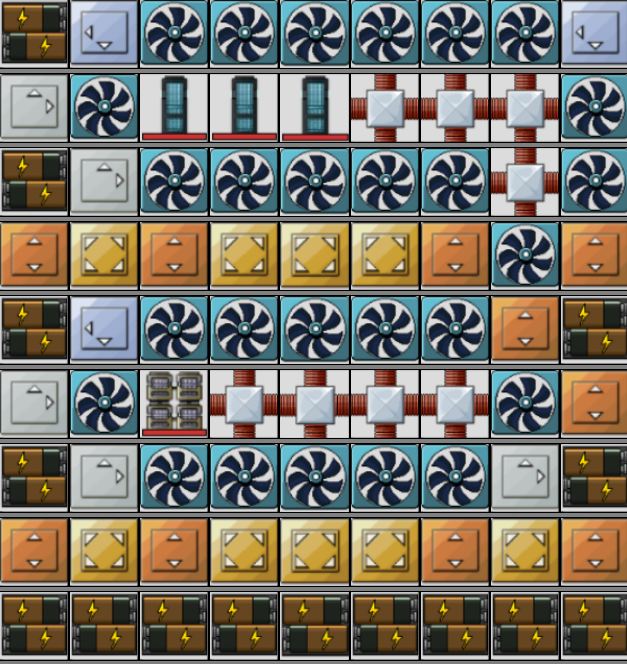
Level 5 Layouts
Level 5 is the end-game playground. Here you can design highly optimized, multilayered systems, often using several Rod types in combinations.
Because space is no longer the primary limitation, Level 5 layouts vary widely based on goals.
At this point, it’s all about optimizing for what you need rather than following a single meta design.
| Layout | Description | Max Energy | Energy/Sec |
|---|---|---|---|
 | Use red rods to get Energy | 6.562,5M | 270 |
 | Use red rods to get Energy | 7.25M | 270 |
 | Use red rods to get Energy | 11.45M | 180 |
 | To get 300 energy/sec quest | 4.437,5M | 300 |
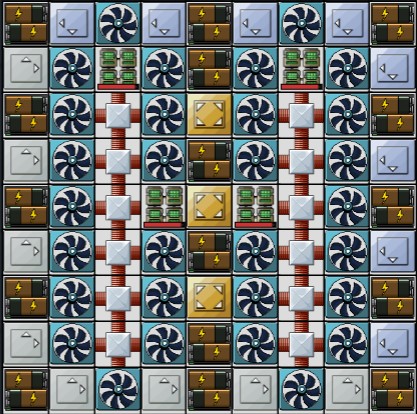 | To get 300 energy/sec quest | 5.65M | 360 |
 | Use green rods to get Energy | 4.65M | 450 |
 | Use blue rods to get Energy | 14.225M | 144 |
 | Use blue rods to get Energy | 10.375M | 216 |
 | Use blue rods to get Energy | 6.5M | 288 |
 | Use gray rods to get Energy | 14.725M | 144 |
 | Use gray rods to get Energy | 7.137,5M | 288 |
 | Use RTG rods to get Energy | 14M | 78 |
 | Use RTG rods to get Energy | 11.05M | 108 |
 | To get Einsteinium | 1.937,5M | 0 |
 | To get Einsteinium and Energy | 2.1M | 60 |
 | To get Einsteinium | 3.375M | 4 |
 | To get Einsteinium and Energy | 3.75M | 24 |
 | To get Einsteinium and Energy | 8.237,5M | 54 |
 | To get Fermium and Energy | 4.9M | 60 |
 | To get Fermium | 3.662,5M | 0 |
 | To get Fermium and Energy | 7.475M | 24 |
 | To get Fermium | 7M | -36 |
 | To get Fermium | 7M | -36 |
 | To get Fermium | 3.637,5M | 0 |
Customizing Mr Mine Reactor Layouts for Your Playstyle
Not every player builds their reactor the same way, and they shouldn’t.
Your ideal layout depends heavily on whether you prioritize energy generation or isotope production, since each focus requires different Rod types, cooling setups, and buff usage.
If your goal is raw energy, you’ll typically run higher-output Rods, supported by a larger number of Batteries. Energy builds also tend to use more Fans overall, because power Rods generate intense heat.
If you’re aiming for isotopes, your layout will often be more selective, using specific Rod types that produce valuable isotope outputs.
As you unlock new Rod types, Buff modules, and Bombardments, revisit your layout.
Early layouts rely on basic Rods and simple cooling, but later modules dramatically change layout possibilities.
If you want to plan advanced builds without wasting components, try the online Reactor Planner by Adversarius, which allows you to simulate layouts safely before applying them in-game.
Heat Management & Efficiency Tips
Heat is the real enemy of any Reactor setup. Every Rod produces heat, and if that heat isn’t removed, your entire system will shut down.
Fans reduce heat directly on adjacent tiles, making placement critical. Ideally, every Rod should touch at least two Fans, and higher-tier Rods may require multiple.
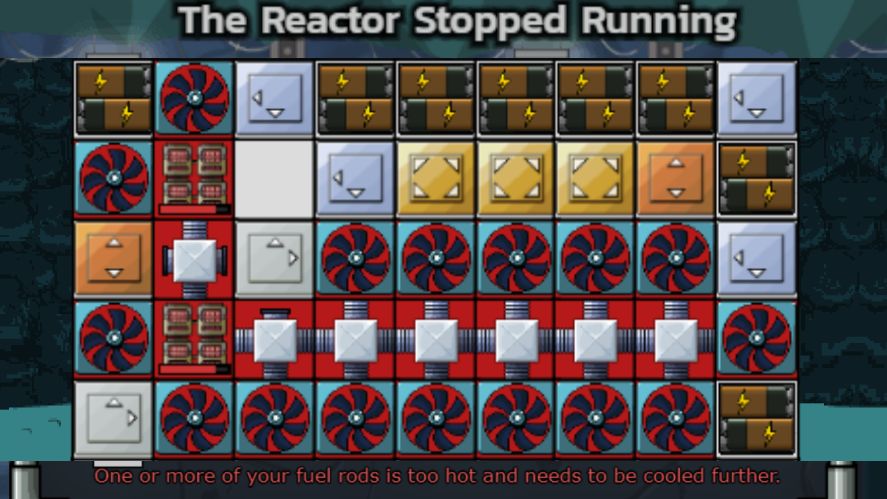
Heat Ducts act like cooling pathways, allowing fans to support rods that aren’t directly adjacent, making your layout far more flexible.
A good rule is: place Rods, then place Fans, then connect everything with Ducts, and only after that add Batteries and Buffs.
Buffs also improve efficiency by increasing the effect of Rods, Fans, and Batteries. However, they can’t boost themselves.
Many experienced players in community note that most beginner layouts fail due to insufficient Fans, not Rod placement. Others emphasize that symmetry isn’t required, but cooling coverage is.
Finally, keep refining your layout as you unlock more components. Reactor design in Mr. Mine is a constant process of tuning, upgrading, and optimizing for your current goals.
Common Layout Mistakes to Avoid
A lot of struggling players aren’t failing because the Reactor is hard, but it’s usually because the layout has one of a few predictable mistakes.
The most common issue is placing too many Fuel Rods without enough cooling. Even powerful layouts fall apart when heat spikes, so Rods should never outnumber Fans.
Another mistake is ignoring Buff placement.
Buffs multiply output, but only when they’re correctly positioned. Many players drop them randomly instead of pairing them intentionally with high-value Rods.
Some players also forget to upgrade the Mr. Mine Nuclear Reactor grid as soon as they unlock new levels.
Larger grids give you better cooling paths, more Duct placement options, and more space to separate heat sources. Staying on a smaller grid too long limits your entire progression.
Finally, using the wrong Rod type for your stage slows everything down.
Early on, simple rods like Uranium are fine, but higher levels introduce Rods that specialize in different outputs.
Choosing Rods based on your goal, not simply the newest unlocked one, makes layouts far more efficient.
FAQs – Mr Mine Reactor Layouts
Upgrade as soon as you meet the requirements. Levels 4 and 5 dramatically expand grid size and unlock more powerful components, making layout optimization much easier.
Start with basic Uranium Rods, then move to stronger Rods as you unlock them. Focus on stable Rods early; save high-heat, high-output Rods for when you have enough Fans and Ducts to support them.
At minimum, each rod should touch two fans, but stronger rods may need more. You can see the heat required in the Rod’s description and divide that number by 12 to indicate the number of Fans needed.
No. Empty tiles are fine. Efficient layouts prioritize cooling and output balance, not filling every square.
Conclusion & Next Steps
Mastering Mr Mine Reactor layouts is all about balancing heat, output, and the unique behavior of each Rod type.
Experimentation is part of the fun. Try new designs, game mechanics, adjust cooling patterns, and refine your game strategy as you unlock more components.
Share your layouts, learn from other players, and join the wider Mr. Mine community to discover even more advanced approaches.
Now it’s your turn! Build a layout, take a screenshot, compare it with guides, and keep tuning it as you climb toward the most powerful Reactor setups in the incremental game.
Related Content & References
- Mr. Mine Wiki: The Reactor
- Mr. Mine Idle: Nuclear Reactor and Mr. Mine’s Buff Lab
- Steam Community discussions
- How to Get Oil in Mr. Mine
