
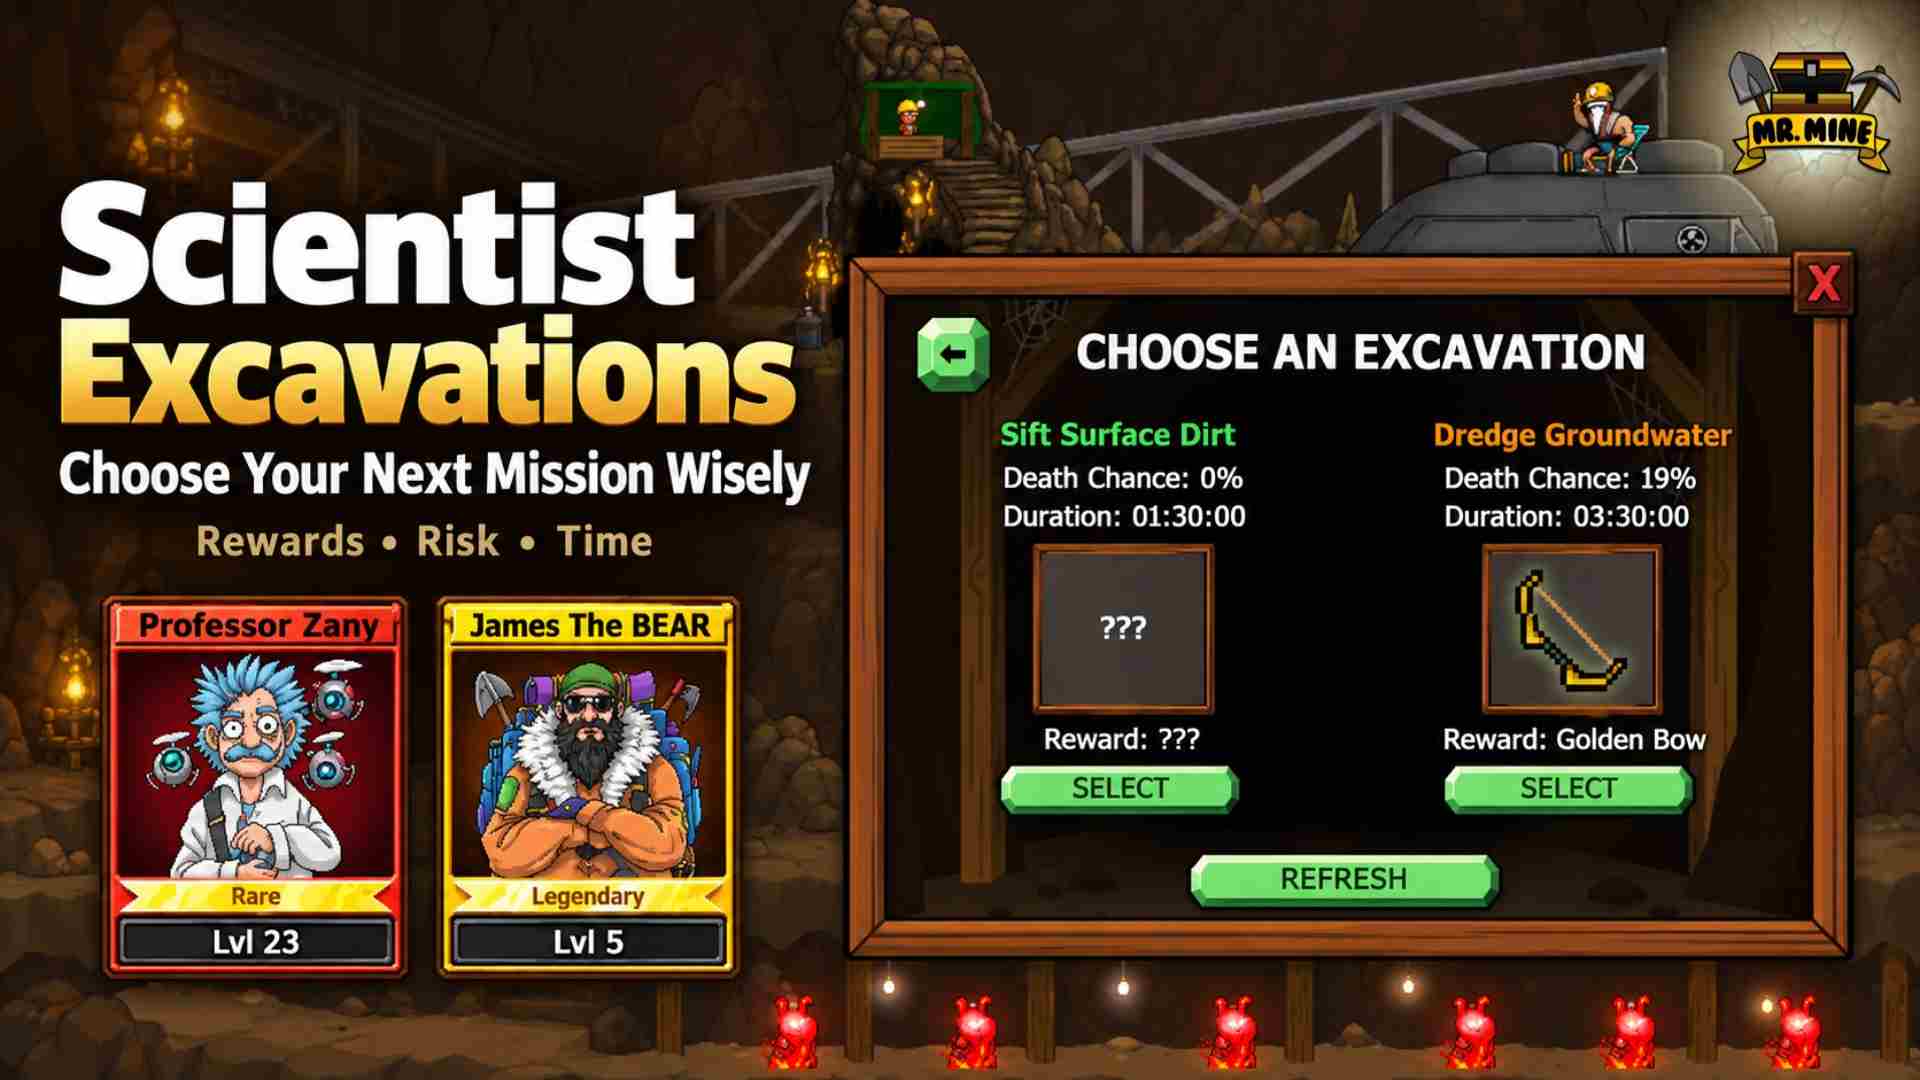
Scientist Excavations in Mr. Mine often leave you with a tough choice: take a useful reward with low risk, or send your Scientist after a rare relic that could cost them their life.
If you have just reached this feature, our Mr. Mine mineshaft guide explains where Scientists fit into your mine. Once you start sending them out, the reward alone should not decide every mission.
Choose the excavation that helps your current goal at a risk you can afford. Check the reward, Death Chance, time, and value of the Scientist before you begin. A smaller payout can be the better choice when it unlocks an upgrade or keeps a strong Scientist alive.
What Are Scientist Excavations in Mr. Mine?
Excavations are timed missions that Scientists run to find rewards. The system unlocks at 50 km, and you can have up to three active Scientists.
Each available Scientist has two mission choices. These can differ in reward, length, and danger. Some show the reward before you start, while others hide it.
How to Start an Excavation
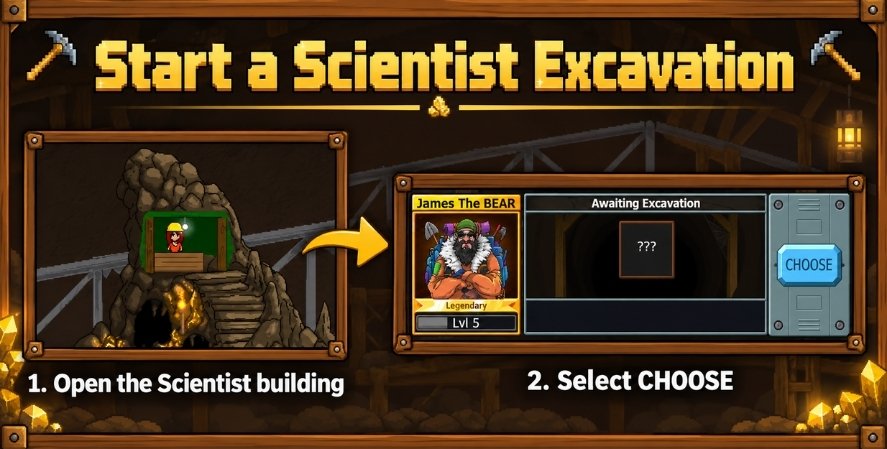
- Open the Scientist building and select a Scientist.
- Compare both mission choices.
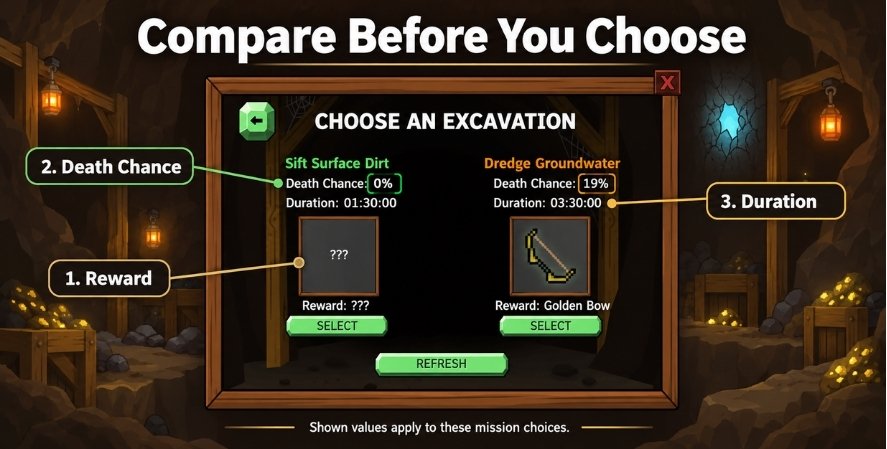
- Check the reward, duration, and Death Chance.
- Start the mission and let its timer run.
- Return to collect the reward after the Scientist completes it alive.
- Choose the next mission once you finish handling the result.
Pay close attention to the label beside the percentage. The browser game shows Death Chance, so a larger number means more danger. Do not read it as your chance to get the reward.
What Can Excavations Reward?
The reward pool includes relics, chests, tickets, money, buffs, Scientists, Building Materials, weapons, and Super Miner Souls. Which rewards can appear depends on the game’s reward rules and your progress.
These rewards serve different goals. A relic can support future growth, while materials can finish an upgrade right now. That is why a single loot ranking will not work for every mine.
Which Scientist Excavations Should You Choose?
Favor a useful relic or hard-to-replace reward when the risk is reasonable. Choose materials when they unlock a key upgrade. Take tickets when you have a clear use for them. If neither reward justifies the Death Chance, protect your Scientist Excavations.
Use this table to narrow down the choice:
| Your situation | What to favor | What to check first |
|---|---|---|
| A relic would improve your mine | The useful relic | Its effect, risk, and free relic space |
| You need better excavation survival | Book of Success | Your current bonus and the stacking cap |
| You want access to later Core upgrades | Book of Secrets | Whether you already have enough for your plans |
| Materials block an upgrade | Building Materials | Whether the reward covers the missing amount |
| You have a clear ticket goal | Tickets | The amount and mission risk |
| You have an empty Scientist slot | A Scientist reward | Whether the mission puts your remaining roster at risk |
| A valuable Scientist faces a weak payout | The safer mission | What you could lose for that reward |
| Both rewards help about equally | Lower risk or shorter time | Which mission fits your next login |
These are choices to weigh, rather than a strict order you must follow.
How to Compare Two Excavations
Start With the Reward’s Use
Ask what the reward would let you do.
For example, a relic that supports your current build may offer more value than cash. However, if a material reward lets you finish a major upgrade, it can beat a relic you would barely use.
Next, ask how easily you could get the reward elsewhere. Money and minerals come from normal mining. A specific relic may take more time or luck to find again.
Read the Death Chance
Use the mission’s displayed risk as your main guide. The difficulty name gives context, but it does not replace the percentage.
Suppose one choice offers materials at low risk. The other offers a relic you do not need at much higher risk. Choose the materials, even if the relic looks more impressive.
Now change the example: the relic would greatly improve your mine, and you can accept losing the Scientist Excavations. The risky choice becomes more reasonable.
Neither example creates a fixed rule. The reward must earn the risk you take.
Count the Cost of Losing the Scientist
A developed Scientist holds hours of progress. If they die, replacing them may take time, and reviving them can cost tickets.
Before a dangerous mission, ask:
- Would losing this Scientist slow my plans?
- Do I have other Scientists to keep excavating?
- Would I pay the ticket cost to revive them?
- Is this reward worth either loss?
If you would regret the trade, take the safer choice.
Match the Timer to Your Schedule
Short missions can give you more chances to collect rewards and choose again. However, that only helps when you return to start another mission.
A two-hour excavation that sits finished all night does not keep producing rewards. If you plan to log off, a longer mission with a useful payout may fit better.
Also, shorter missions do not promise the same rewards next time. New choices can change. Compare what you have now rather than assuming you can repeat the best option all day.
Separate Scientist Level From Rarity
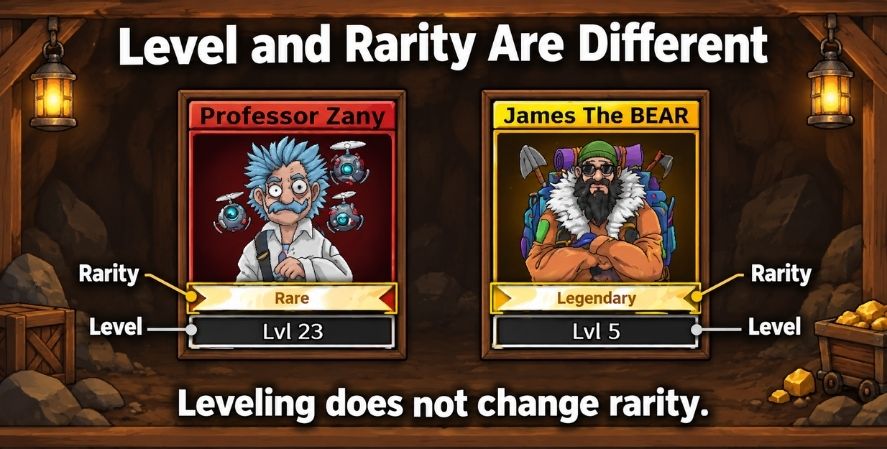
Level and rarity affect different parts of the system:
| Factor | What it affects |
|---|---|
| Scientist level | Mission generation, some reward amounts, and mission timing |
| Scientist rarity | Built-in death-risk reduction, XP gain, and parts of reward selection |
| Excavation difficulty | The starting danger and reward-generation rules |
| Relics | Bonuses such as lower excavation risk or more Scientist XP |
Leveling does not change a Scientist’s rarity or directly reduce Death Chance. A high-level Common Scientist still lacks the built-in risk reduction of a Legendary Scientist Excavations.
At the same time, rarity does not promise a specific relic. Always check the actual mission. Our Scientist rarity guide covers the roster in more detail.
Which Rewards Deserve Priority?
Useful Relics
Relics grant ongoing bonuses while you keep them in your inventory. Their value depends on the effect and how well it supports your goals.
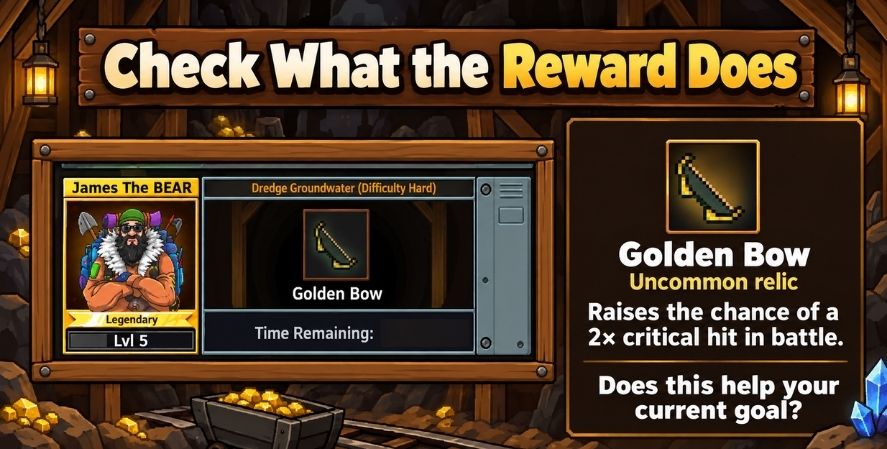
For instance, a relic that helps your main source of progress may be worth more than a small cash reward. However, do not risk a prized Scientist for an unwanted duplicate just because it is a relic.
Check your current collection first. You may need a new bonus, a useful extra copy, or scraps from a relic you can spare.
Book of Success
Book of Success deserves special attention if you run excavations often. It lowers excavation death risk, which helps protect Scientist Excavations during future missions.
The normal, Warped, and Divine versions have effect values of 10%, 12.5%, and 15%. Copies stack toward a 75% cap on this relic effect.
That cap does not mean all missions have a 75% success chance. It also does not make Scientists immune to death.
The game applies this bonus to the remaining risk. As a simple example, a 10% reduction applied to a 20% death risk gives about 18% risk, before display rounding. It does not turn that 20% into 10%.
Use the percentage on the mission card when making your choice. This avoids having to work out every modifier yourself.
Book of Secrets
Book of Secrets matters later because you can sacrifice it to change the Core’s state. Those states let you pursue stronger relics and Warped Scientists.
Keep it when you expect to use those systems. You may need more than one for your plans, so avoid scrapping your last copy without checking what comes next.
For the full process, read our Introduction to the Core.
Treasure Chests
Chests offer a mix of possible rewards. Basic Chests can provide items such as money, materials, Scientists, and timelapses. Gold Chests can also offer rewards such as tickets and drill blueprints.
Still, the contents vary. If you need a set amount of materials, a shown material reward can be a better choice than hoping a chest contains them.
Compare the chest type, mission risk, and what your mine needs. Our treasure chest guide explains the different pools.
Tickets
Tickets have several uses, including refreshing excavation choices and reviving Scientists. Their value rises when you have a specific purchase or action in mind.
However, a few tickets may not justify risking a Scientist whose revival would cost more. Compare the possible gain with the cost you might face.
Building Materials
Choose Building Materials when they remove a clear obstacle.
If an upgrade needs five more materials and the mission offers enough, the reward has an immediate purpose. More cash will not solve a material shortage.
On the other hand, materials become less urgent when you already have enough for your planned upgrades.
Scientists and Other Resources
Scientist rewards can help when you have an open active slot. Check your roster first, since the active limit is three.
Money, minerals, buffs, weapons, and other rewards can also be useful. Choose them when they support a current goal, rather than dismissing them as lower-tier loot.
Should You Choose the Hardest Excavation?
Higher difficulty can offer access to stronger rewards, but it also starts with more danger.
The browser game’s base ranges are:
| Difficulty | Base death risk before Scientist and relic modifiers |
|---|---|
| Easy | 0% |
| Medium | 5–10% |
| Hard | 25–50% |
| Nightmare | 50–99% |
These are starting ranges, not the final risk for every Scientist. Rarity and relic bonuses change the risk shown on the mission card.
Easy and Medium Missions
Easy missions are useful for steady progress because they begin with no death risk. Medium missions introduce some danger, so check whether their reward is worth it.
These choices often suit a Scientist you want to preserve. However, compare the payout and time too. Safety alone does not tell you which of two safe rewards helps more.
Hard and Nightmare Missions
Consider these missions when the reward serves a clear goal and you can accept the loss.
For example, a rare relic you need may justify a risk that ordinary cash would not. Better rarity and Book of Success can help, but they do not make every dangerous mission safe.
A Nightmare excavation also matters for the Fearless Or Stupid achievement, which requires completing one. Check our Mr. Mine achievements guide if that is your goal.
Do not assume Nightmare missions only appear at high levels. The current browser game’s mission generator can offer them much earlier.
What Happens When a Scientist Dies?
Death does not always mean you must lose the Scientist for good. The game offers a ticket revival option. Burial can also trigger a resurrection chance, which Scythe-type relics can improve.
If you bury the Scientist and they do not return, you lose that active Scientist and their level progress.
Check the revival cost before deciding. Saving a developed Scientist may be worth the tickets, while replacing a low-level one may better suit your budget.
Most of all, avoid treating revival as a reason to take every risk. Tickets spent fixing a poor mission choice cannot help with other goals.
How Relic Scraps Change Excavation Choices
Relic scraps give unwanted relics another use. You can scrap a relic and spend the scraps on relevant Trading Post offers.
As a result, a duplicate can still have value. Before scrapping it, compare that value with the bonus you would lose. Extra Books of Success, for example, may help until you reach the cap.
Keep Space for Relic Rewards
A full relic inventory blocks claiming a new relic. It does not immediately erase the completed excavation reward.
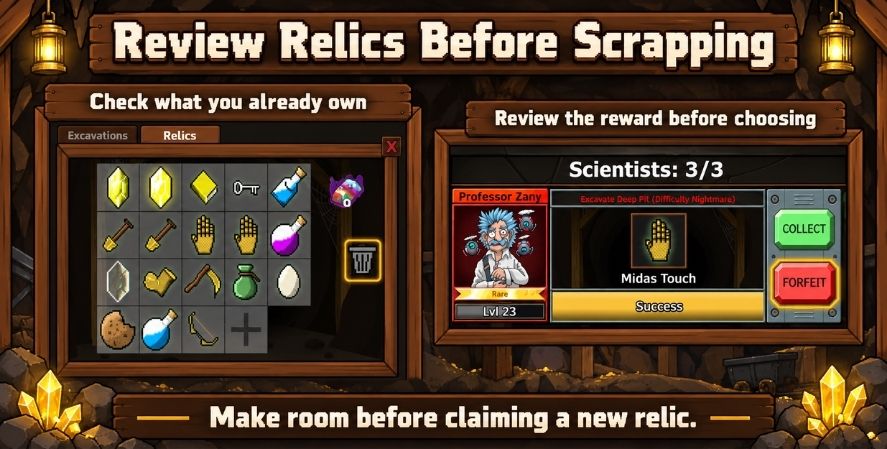
Make room, then collect it. You can also choose to forfeit an unwanted excavation relic for scraps through the game’s reward options.
While the reward waits, that Scientist cannot move on to the next mission. Preparing space helps you keep the system active without rushing into a bad scrap choice.
Our Relic Scraps guide covers the wider scrap economy.
Best Strategy at Each Stage
| Stage | Main focus | Practical approach |
|---|---|---|
| Just unlocked Scientists | Build steady progress | Run useful low-risk missions and fill open slots |
| Developing your mine | Solve upgrade gaps | Compare relic effects with materials and other needed rewards |
| Working on harder missions | Protect your roster | Improve relic support and check each Death Chance |
| Using the Core | Plan specific upgrades | Keep needed Books of Secrets and weigh sacrifice costs |
| Large relic collection | Improve what you own | Keep useful copies and turn spare relics into scraps |
Your goals can overlap. You might need materials today and a Core relic tomorrow. Adjust your choices as those needs change.
Warped Scientists belong to the Core system, rather than normal level growth. A successful transformation starts the returned Scientist Excavations at level 1. Plan for that reset before sacrificing one you spent time leveling.
Common Excavation Mistakes
- Reading Death Chance as success chance. Higher means more danger.
- Assuming level makes a Scientist safer. Level does not directly lower death risk.
- Choosing difficulty before checking loot. A harder mission may offer something you do not need.
- Treating hidden rewards as a known jackpot. You cannot rank an unseen item as though you know what it is.
- Ignoring time between logins. Short missions help most when you can return to restart them.
- Scrapping useful relics in a rush. Check their effect and future use first.
- Risking a strong Scientist for a minor gain. Include loss or revival costs in the choice.
If both missions are poor, consider a ticket refresh. Compare that cost with the value of a better choice, rather than refreshing until you find perfect loot.
Scientist Excavations FAQ
What is the best excavation in Mr. Mine?
The best choice offers a reward you need at a risk you can accept. Useful relics often deserve attention, but materials can take priority when they unlock a key upgrade.
Are longer excavations better?
They can offer strong rewards, but length alone does not make them better. Compare the payout, Death Chance, and when you can return to play.
Does Scientist level lower death risk?
No. Level affects other parts of excavations. Rarity and relevant relic bonuses affect death risk.
Does a Legendary Scientist guarantee better loot?
No. Rarity affects reward selection and some reward amounts, but it does not guarantee a specific item. Compare the mission choices you actually receive.
Should I choose tickets or a relic?
Choose the relic if its effect or future use matters more to your mine. Choose tickets if you have a clear use for them and the available relic adds little value.
Should I choose materials or a chest?
Favor the shown materials when they solve an upgrade shortage. A chest can be worth choosing when you want its possible rewards and do not need a specific payout.
Can I lose a relic because my inventory is full?
A full inventory prevents you from claiming it. Free a slot to collect it, or use the reward option to forfeit an unwanted relic for scraps.
Are Nightmare excavations worth the risk?
Sometimes. They can help with a rare reward or the Nightmare completion achievement. Check the displayed Death Chance and the cost of losing your Scientist first.
Choose the Mission That Moves Your Mine Forward
Start with reward value and how hard it is to replace. Then check your chance of finishing alive, the Scientist you could lose, and the mission time. Finally, make sure the reward supports what your mine needs now.
Use that process whenever new Scientist Excavations appear. You will have a clear reason for each choice, whether you chase a rare relic or take the safer materials.
For more help, explore the Mr. Mine Wiki and our Achievements Guide.
Start your mining adventure in Mr. Mine and put your next excavation reward to work.